token-listing
Token Listing
The listing process
Any project is, in principle, eligible for listing. A simple criteria is to have an ESDT token, either natively minted on the MultiversX blockchain, or bridged over from another ecosystem.
Important: only the token creator (i.e. Hatom for $HTM) can perform the listing process. In the initial phase, tokens can be paired with EGLD and USDC.
1. Register New Token
Add your token to the MultiversX Web Tools as described here https://github.com/multiversx/mx-assets. Once the registration process is complete, your token will be usable in the xExchange for the next steps of the listing process.
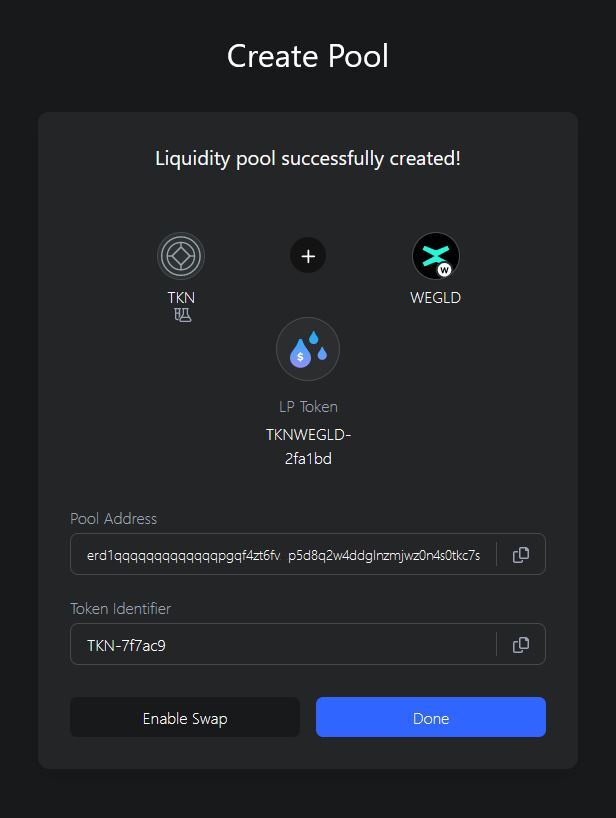
2. Create Pair
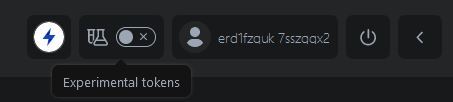
You will be able to create a liquidity pool for your token with either EGLD or USDC. New pairs will be automatically added to the Experimental category, if the token doesn’t have a pair already listed under another category. Liquidity pools listed under the Experimental category will not be automatically displayed on xExchange, unless users toggle the specific button to make them visible. Tokens from this category will have a 🧪 icon displayed next to them.
Note: only the token owner account can initiate the listing process. This way, token owners have control over the chosen pair and initial price.
- Select “Liquidity” from the top menu
- Go to “Active Pools” and click on the “Create New Pool” button
- Select the desired branded token and choose between pairing it with EGLD or USDC
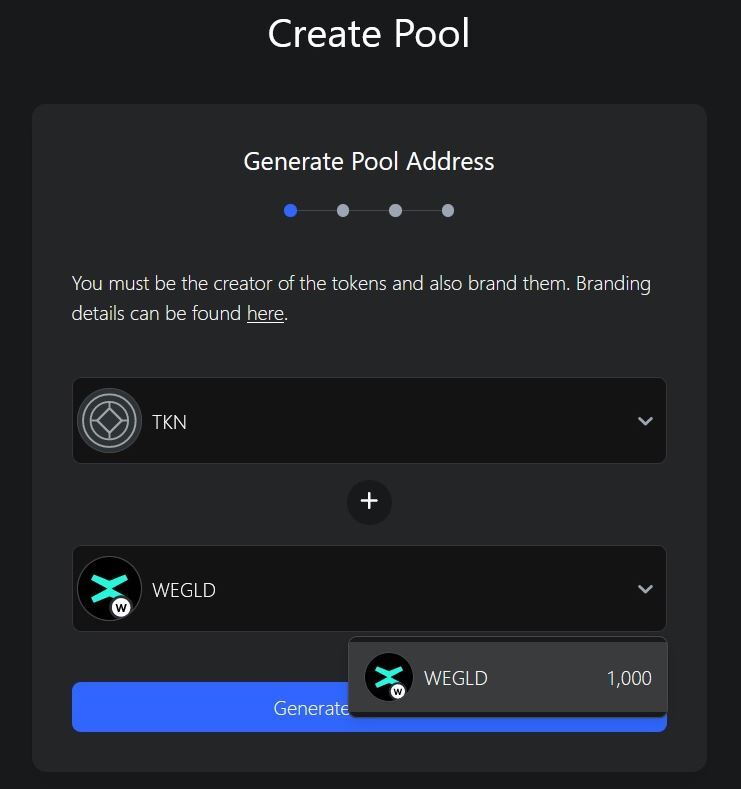
- Click on “Generate Pool Address”
During the next step, the interface will show the pool contract address. Also, you will be able to set up your LP Token Name and Ticker (must be between 3 - 10 characters long)
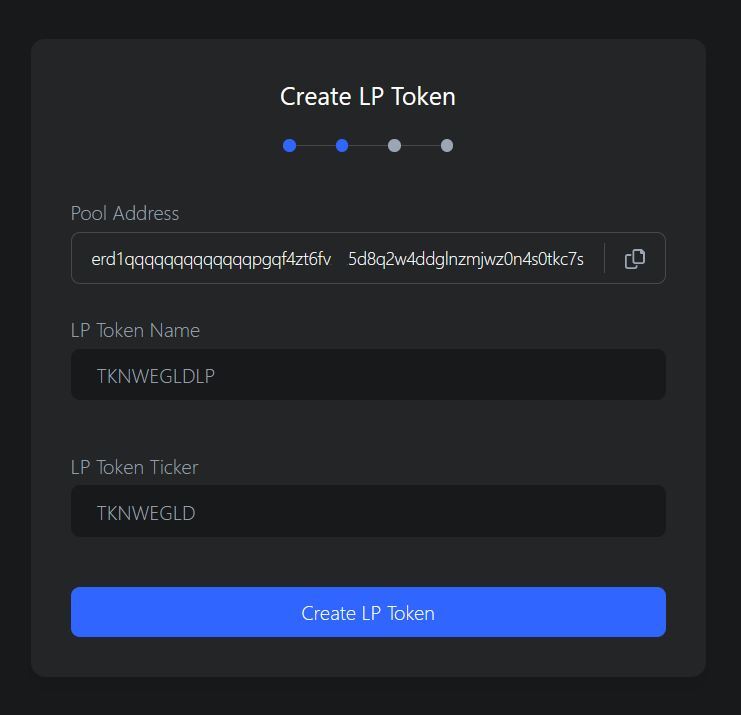
- Click "Create LP Token"
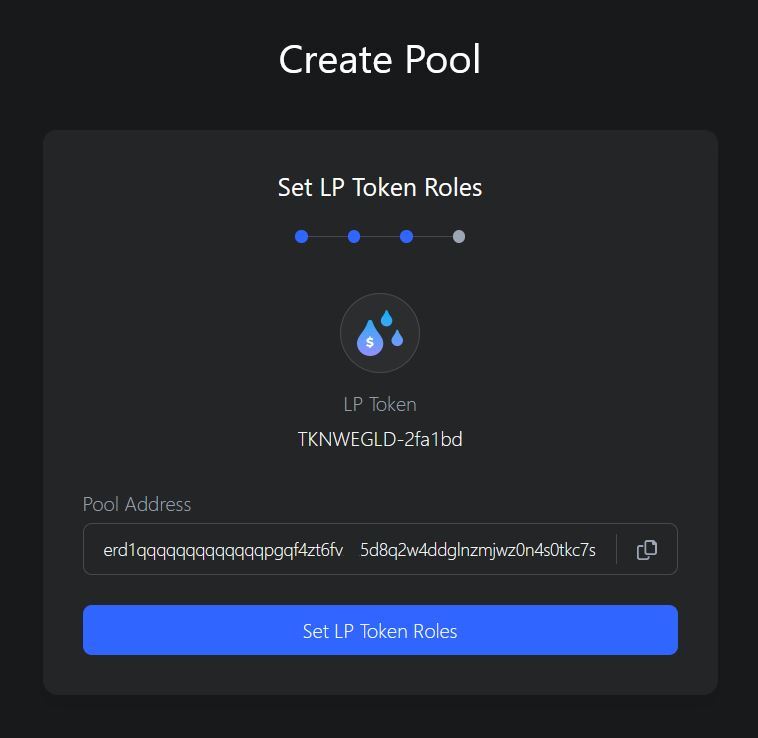
- The next step requires you to click on “Set LP Token Roles”
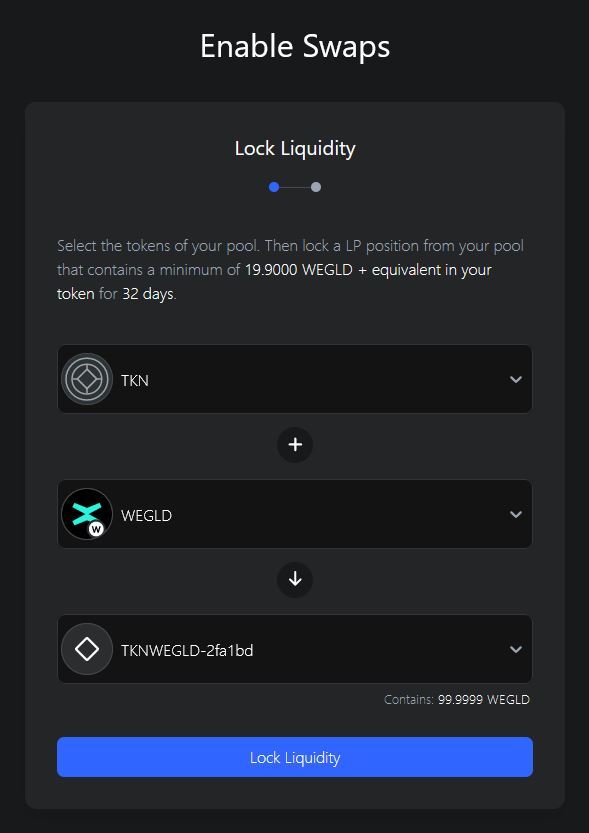
3. Add initial liquidity
Token creators will set the parity between their listed token and its pair by adding initial liquidity. The ratio between the two tokens determines the initial token price.
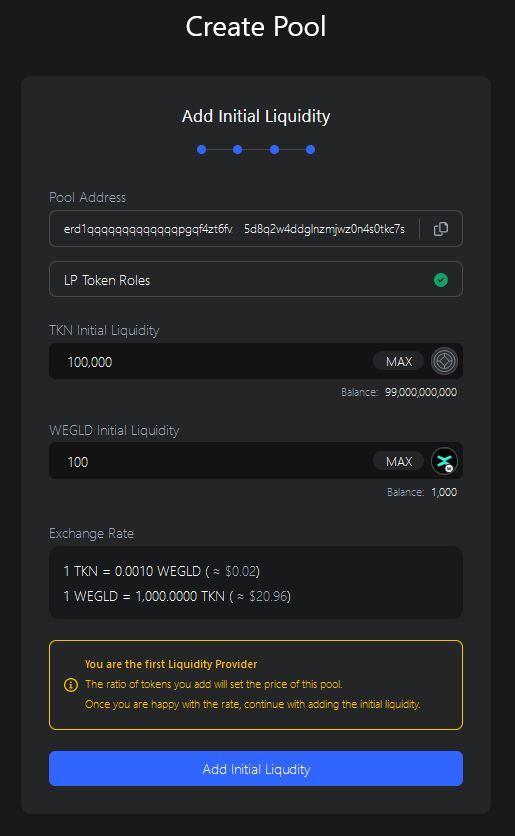
Make sure you set the right ratio between the tokens, and that you have the specified amounts available in your wallet, then click on "Add Initial Liquidity".
After the add liquidity transaction is confirmed, your Liquidity Pool will be successfully created.
Reminder: Liquidity Pools listed under Experimental category become visible only by toggling the specific button, when users are logged in. Tokens from this category will have a 🧪 icon displayed next to them.
Congratulations, you have created your token pair!

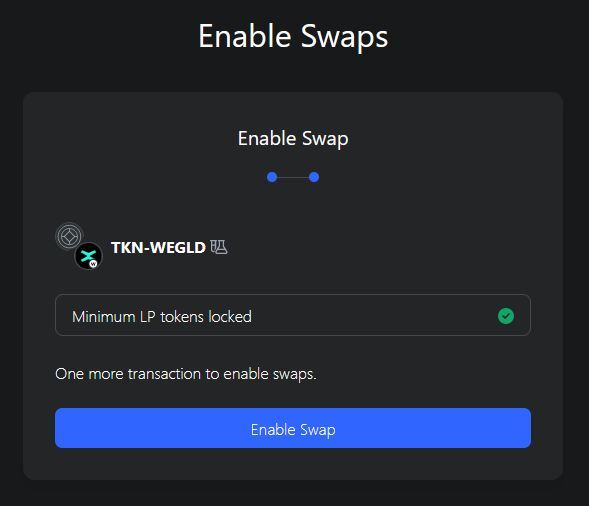
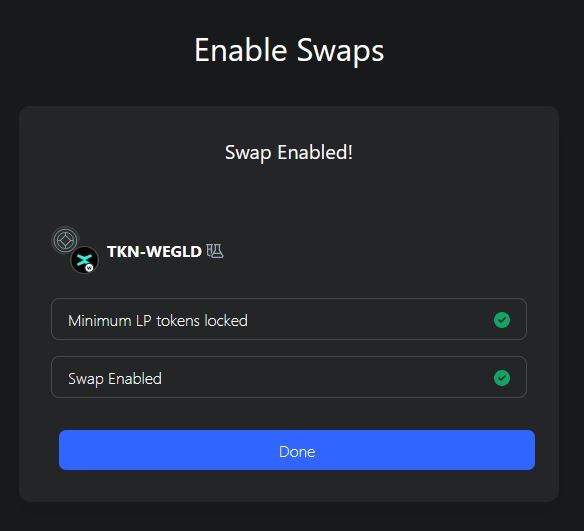
4. Enable swaps
Pairs against EGLD and USDC require no listing permission. Initially, the token should be paired with a minimum of 500 $USDC or 20 $EGLD in liquidity to activate this function. This liquidity will be locked for 32 days.
As the listing process is completely permissionless (unrestricted, available to anyone), users should exercise caution and always do their own research.